I decided that I wanted to hang some more pictures in our house, but I was tired of using frames. I started looking into having some photo canvases made… I was SHOCKED at how expensive they were!!! Thus, began my search on how to transfer a photo to canvas.
There are a lot of tutorials out there that show you how to mount a picture to canvas. This is a neat idea, but it was not what I was looking for. I wanted my photo to look like it was canvas. When you mount a photo onto canvas, it does not take on the “cross-hatched” properties of the canvas.
I finally found a tutorial that looked like it would work for transferring an image. I have tried it a few times now and have modified the original tutorial to make it even better 🙂
So here it goes!!
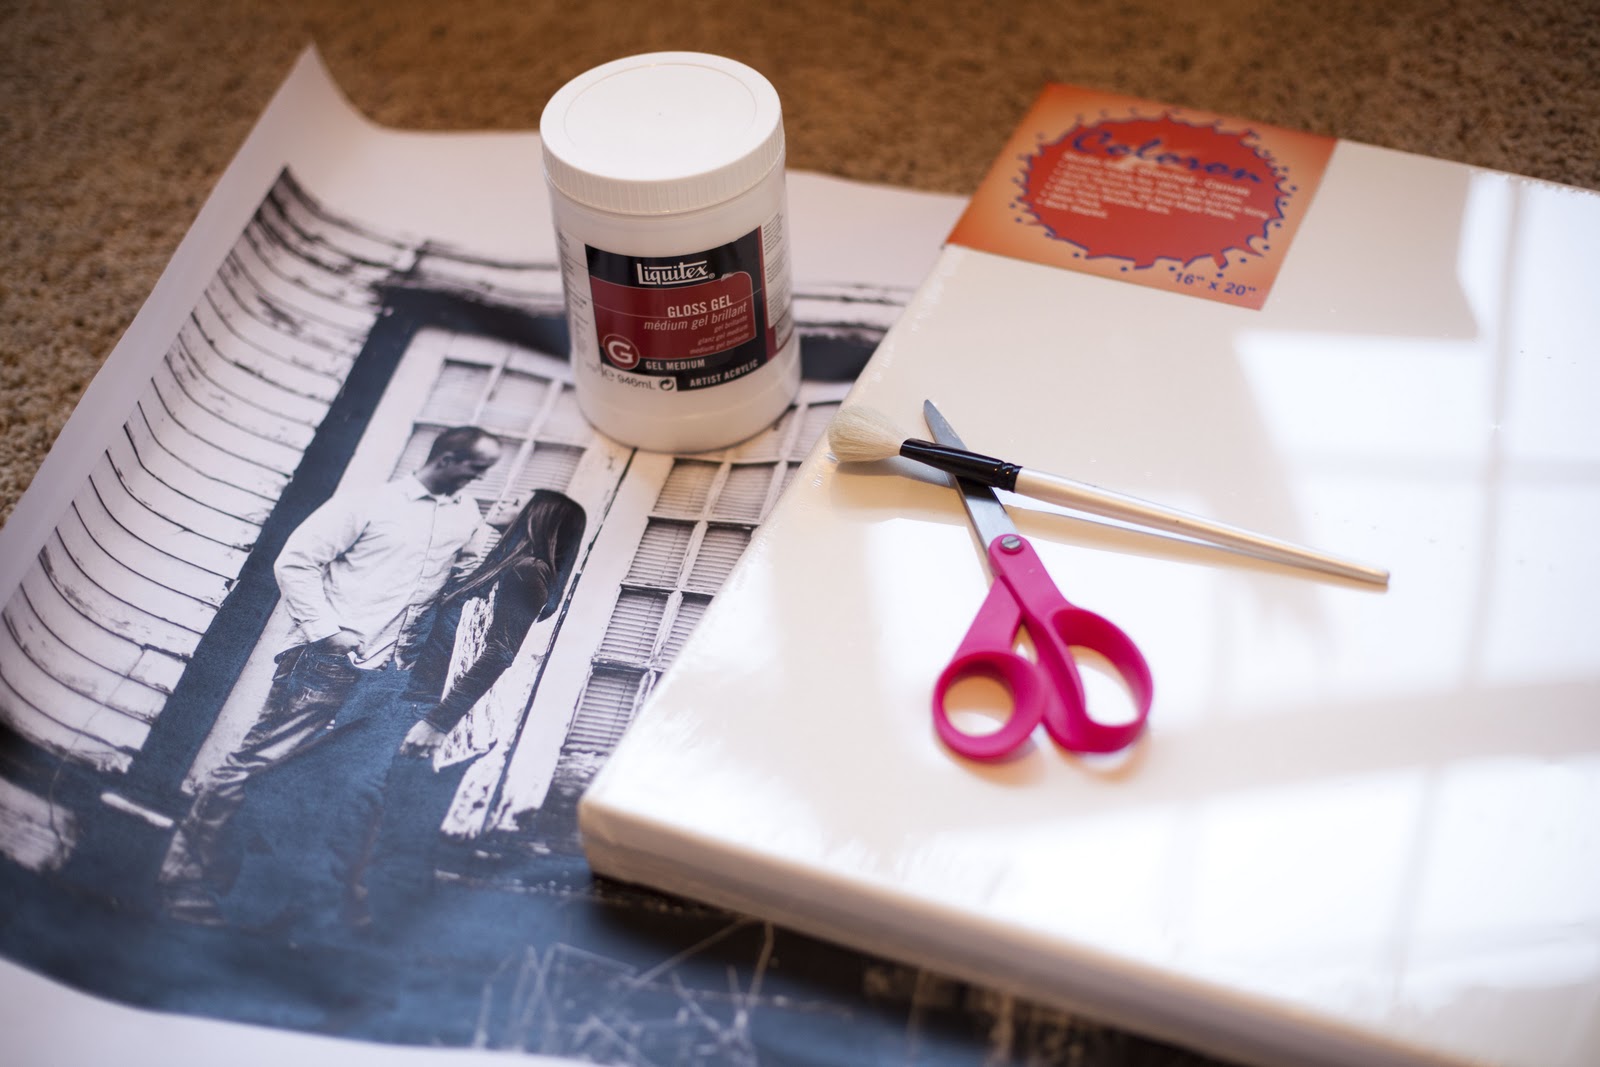
You will need the following materials:
– Canvas
– Liquitex
– Paintbrush
– Laser Printed Photo (It is important it is laser)
– Scissors
– Spray Bottle with Water
– Mod Podge
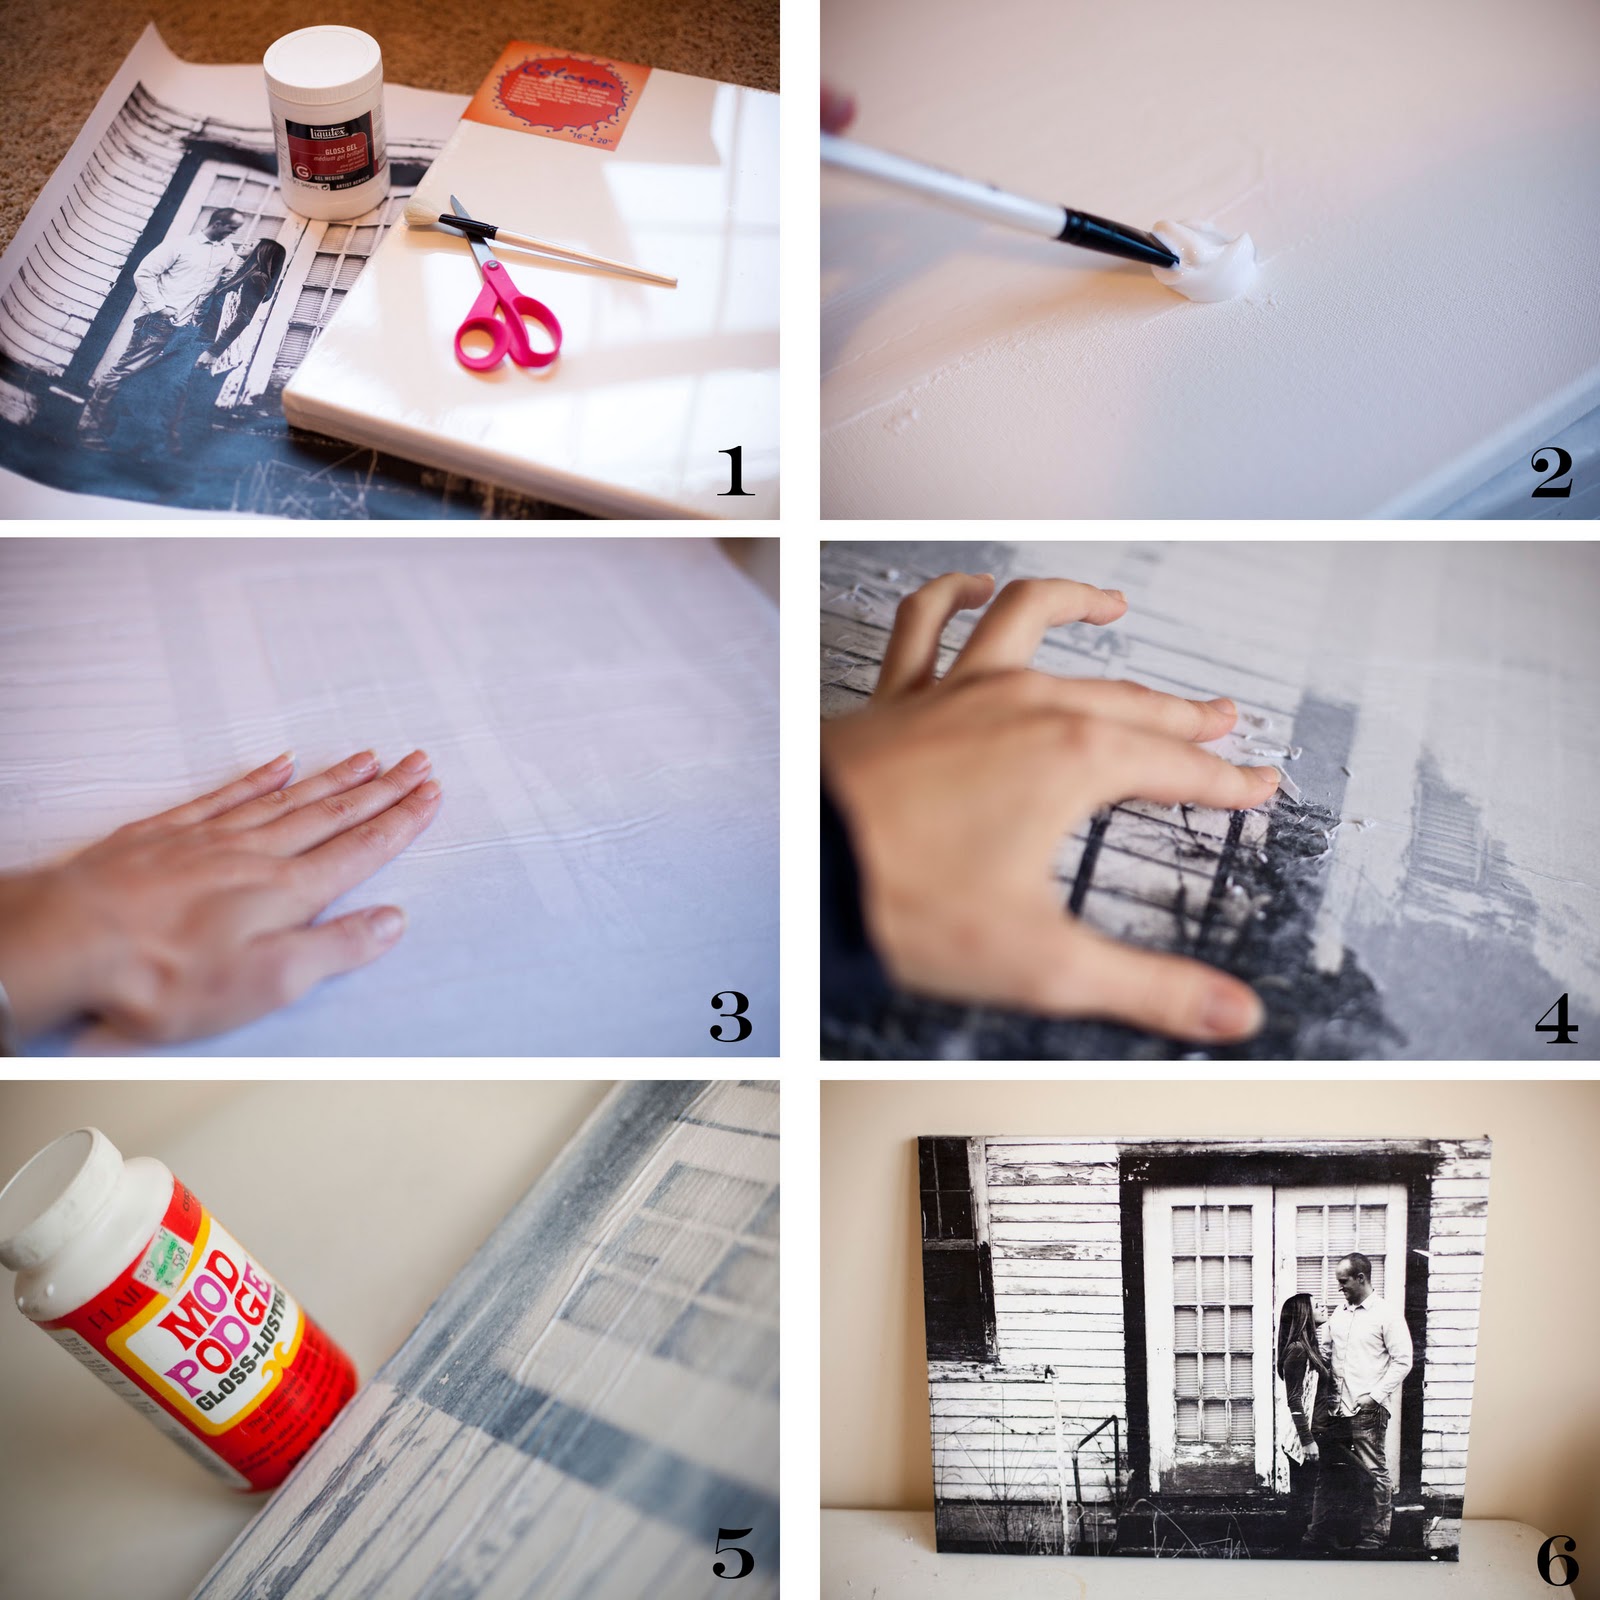
Step 1:
Print your photo on a laser printer. Since we own an ink jet printer, I went to FedEx/Kinkos and had them print me one. If you make a canvas that is smaller than an 8.5″x11″ you can have them print a color copy for very cheap, but if you are looking to make larger prints like I am, I went with an “engineer” print in black and white. It is possible to get a color photo that is large, but you are talking a significant increase in price!
Since I like to have the edges of my canvas covered as well, I printed the photo larger than the surface area of the canvas so I could wrap it around the edges. Example: I had a 16″x20″ canvas, so I printed an 18″x22″ photo.
Step 2:
With a paint brush, smooth a thick layer of Liquitex onto the canvas. The thicker the Liquitex, the better your image will adhere.
Step 3:
With the Liquitex still wet, smooth your photo onto the canvas face down (your image will be reversed in the finished product). Make sure that you smooth the paper as you lay it down. I suggest working from one end to the other as you lay the paper down to avoid bubbles. I had some ripples in one of my finished products, and I believe this is from placing the entire photo down before smoothing.
Step 4:
For the edges and corners, I wrapped the paper around the edges and pinched the paper in the corners (the edges DO have Liquitex on them as well).
Step 5:
Let it dry over night.
Step 6:
Wet the paper with the spray bottle. Then beginning rubbing the paper with your fingers. This is the messy and fun portion of the project… you get your hands dirty!! As you rub away the paper, you will see your image will begin to appear. This step takes some time and patience. Be sure you get all of the paper off without rubbing too hard and removing some of your image.
Step 7:
Once you have completely removed the paper and it’s residue (I usually use a damp washcloth for the final touches on cleaning the paper off the canvas), your image will be revealed. After this, apply a coating of Mod Podge. In the tutorial I read, it suggested putting another coating of Liquitex on top of the canvas, but Liquitex is not a “finishing” produce. So I use Mod Podge instead… this will give it longer lasting properties.
Step 8:
Let dry and….. Ta-da!!!!!!
Condensed Steps:
Gotta give credit where credit is due… Here is the link the original blog: http://abeautifulmess.typepad.com/my_weblog/2011/10/make-your-own-canvas-portrait.html